


Cart
How Do You Install Astove Jack Kit for Tent?
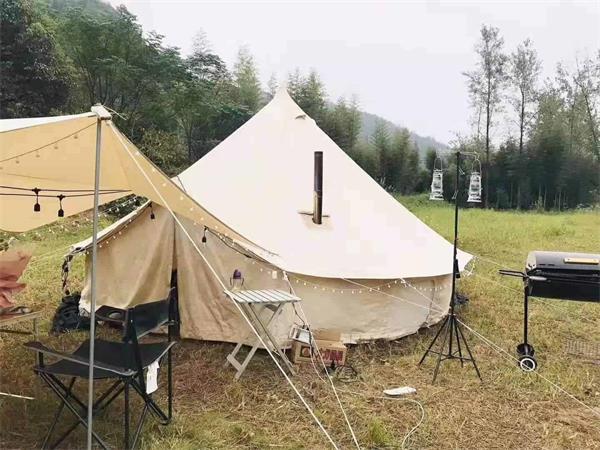
If you’re planning a camping trip in cold weather, you’ll need a way to keep warm. A stove jack kit for your tent is the perfect solution. It allows you to safely install a wood stove inside your tent, keeping you warm and cozy all night long. In this article, we’ll walk you through the steps to install a stove jack kit for your tent.
Step 1: Choose the Right Location
The first step in installing a stove jack kit is to choose the right location for your stove. You’ll want to find a spot that’s away from any flammable materials, such as your tent walls or roof. You’ll also want to make sure that the location is easily accessible and that there’s enough space for your stove and chimney.
Step 2: Cut a Hole in Your Tent
Once you’ve chosen the location for your stove, it’s time to cut a hole in your tent. You’ll want to use a sharp knife or scissors to cut a hole that’s slightly smaller than the diameter of your stove jack. This will ensure a snug fit and prevent any drafts from entering your tent.
Step 3: Install the Stove Jack
Now it’s time to install the stove jack. Start by placing the stove jack on the outside of your tent, centered over the hole you just cut. Make sure that the stove jack is level and that the edges are flush with the tent fabric.
Next, use a pencil or marker to trace the outline of the stove jack onto your tent. This will help you to position the flashing correctly.
Step 4: Install the Flashing
The flashing is what seals the stove jack to your tent and prevents any water from entering. To install the flashing, start by cutting a hole in the center of the traced outline. This hole should be slightly smaller than the diameter of your chimney pipe.
Next, place the flashing over the stove jack, making sure that the hole in the flashing lines up with the hole in the stove jack. Use a screwdriver to secure the flashing to your tent, making sure that the screws are tight and flush with the flashing.
Step 5: Install the Chimney Pipe
Now it’s time to install the chimney pipe. Start by inserting the pipe through the hole in the flashing and stove jack. Make sure that the pipe is centered and that there’s a tight seal between the pipe and the stove jack.
Next, attach the chimney pipe to your stove. You’ll want to use a pipe collar to secure the pipe to your stove and prevent any leaks.
Step 6: Test Your Installation
Before you start using your stove, it’s important to test your installation. Start by lighting a small fire in your stove and checking for any leaks or drafts. If you notice any issues, make sure to address them before using your stove for an extended period of time.
Conclusion
Installing a stove jack kit for your tent is a great way to stay warm and cozy during cold weather camping trips. By following these simple steps, you can safely and easily install a wood stove inside your tent. Just remember to choose the right location, cut a hole in your tent, install the stove jack and flashing, attach the chimney pipe, and test your installation before using your stove. Happy camping!
- Contact Us
-

Built for Outdoor Life!
At POMOLY, every product is designed with purpose and built for real outdoor use. From winter camping to remote backcountry adventures, our tents and stoves are made to perform in tough conditions.
Tested in the wild and trusted by hundreds of thousands of campers worldwide, POMOLY gear is built to keep you ready for every adventure.
Follow Page / Join GroupWorking Hours
Mon-Fri, 09:00 - 17:00

- Company Info
- About us
- Contact Form
- Pomoly Name
- Leave-No-Trace
- Facebook Group
- YouTube Videos
- Contact Info
- Topic Collections
- Policies & Terms
- Payment Policy
- Shipping Policy
- Return & Refund
- Privacy Policy
- Terms of Use
- Duty Policy
- Product Safety Notice
- Warranty Guidelines
- INTELLECTUAL PROPERTY RIGHTS
- User Center
- Forget Password
- My Orders
- Tracking Order
- My Account
- Register
- Popular Searches
-
Tipi Tents Dome Tents Camping Tent Hammock Stove Camping Camping Pellet Stove Circle 6 Titanium Water TankDome X Locomotive 20 LEO 2 camping tent T-Brick 2.0 T1 2.0 tent stove Dweller wood stove Oroqen 2.0 Chimney Water Tank Lumberjack STOVEHUT Bromance 70 Tipi Pomoly Coupon Baker Oven Stove Titanium elbow Fire Pits Tent Stove titanium Stove
Copyright © 2025 Pomoly All rights reserved. Sitemap
FREE SHIPPING | FULL REFUND | SAFE PAYMENT | EMAIL SUPPORT 粤ICP备2022065948号