


Cart
How to Install a Wood Burning Stove Into an Existing Chimney
If you're looking to install a wood stove in your home, using an existing chimney can be a practical and cost-effective solution. This article will guide you through the process of wood burning stove installation, offering helpful tips and advice to ensure a safe and efficient setup.
-
Assess the Existing Chimney
Before you start the wood burner installation, it's essential to inspect your existing chimney to determine its condition and suitability for a wood stove. Check for any damage, blockages, or creosote buildup that may need to be addressed before proceeding with the stove installation.
-
Choose the Right Wood Stove
Selecting the right wood stove is crucial for safe and efficient operation. Consider factors such as the size of your room, heating requirements, and the stove's efficiency rating. Consulting with wood stove installation near me experts can be helpful in finding the perfect stove for your needs.
-
Ensure Proper Ventilation
Proper ventilation is vital for a wood burning stove installation. Your stove should be connected to the existing chimney using a suitable flue pipe. The flue pipe should be the same diameter as the stove's outlet and made of stainless steel or other high-temperature materials.
-
Install a Chimney Liner
Installing a stainless steel chimney liner is recommended for safety and optimal performance. A properly sized liner ensures that the smoke and gases produced by the stove are effectively vented outside, reducing the risk of creosote buildup and potential chimney fires.
-
Install a Chimney Cap
A chimney cap helps to prevent rain, debris, and animals from entering your chimney, keeping it clean and functional. Installing a chimney cap is a crucial step in the wood burning stove installation process.
-
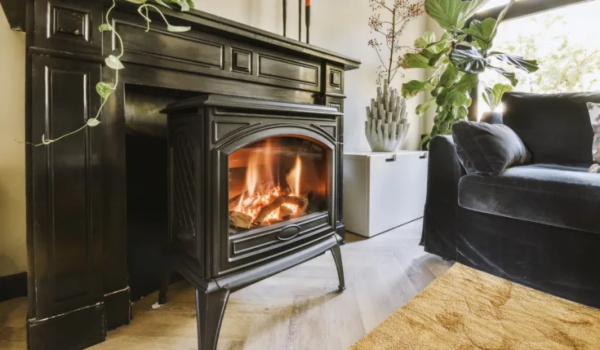
Position the Stove
Place your wood stove on a non-combustible hearth pad, ensuring that it meets the manufacturer's recommended clearances from walls and combustible materials. Proper positioning is crucial for safe and efficient stove operation.
-
Connect the Stove to the Flue
Using the appropriate flue pipe, connect your wood stove to the existing chimney. Make sure all connections are secure and properly sealed to prevent any smoke or gas leakage.
-
Install a Carbon Monoxide Detector
For added safety, install a carbon monoxide detector near your wood stove. Carbon monoxide is a colorless, odorless gas produced by incomplete combustion, and a detector can alert you to any potential issues with your stove's operation.
-
Test Your Wood Stove
Once everything is in place, it's time to test your wood stove. Light a small fire and monitor the stove's performance, ensuring that smoke and gases are properly vented through the chimney.
-
Schedule Regular Maintenance
To maintain your wood stove's efficiency and safety, schedule regular maintenance with wood burning stove installers near me or pellet stove installation near me professionals. This includes annual chimney cleaning and inspections, as well as checking for any damage or wear on the stove itself.
In conclusion, installing a wood burning stove into an existing chimney can be a straightforward process when done correctly. By following these steps and seeking professional guidance when necessary, you can enjoy the warmth and ambiance of your wood stove while ensuring the safety and efficiency of your installation.
- Contact Us
-

About Pomoly
Pomoly is a leading camping brand specializing in hot tents and tent stoves. We are camping life explorer, Follow Page / Join Group, let's make camping enjoyful together!
Working Hours
Mon-Fri, 09:00 - 17:00

- Company Info
- NEWS
- About us
- Pomoly Name
- Leave-No-Trace
- Contact Now
- Facebook Group
- YouTube Learning
- Contact Us
- Topic Collections
- Policies & Terms
- Payment Policy
- Shipping Policy
- Return & Refund
- Privacy Policy
- Terms of Use
- Tax Policy
- Website Disclaimer
- Safety Disclaimer
- Warranty Policy
- Promotion Policy
- Pre-order Policy
- INTELLECTUAL PROPERTY RIGHTS
- Dealers Agreement And Terms
- Become Affiliate
- User Center
- Forget Password
- My Orders
- Tracking Order
- My Account
- Register
- Popular Searches
-
Tipi Tents Dome Tents Camping Tent Hammock Stove Camping Camping Pellet Stove Circle 6 Titanium Water TankDome X Locomotive 20 LEO 2 camping tent T-Brick 2.0 T1 2.0 tent stove Dweller wood stove Oroqen 2.0 Chimney Water Tank Lumberjack STOVEHUT Bromance 70 Tipi Pomoly Coupon Baker Oven Stove Titanium elbow Fire Pits Tent Stove titanium Stove Outdoor Pellet Stove
keebon pellet stove
Copyright © 2023 Pomoly All rights reserved. Sitemap
FREE SHIPPING | FULL REFUND | SAFE PAYMENT | EMAIL SUPPORT 粤ICP备2022065948号