


Cart
How to Install the Flue pipe on the Wood Burning Stove?
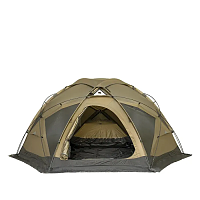
Installing a wood stove flue can seem like a daunting task, but with the right tools and some basic knowledge, it can be done easily and safely. A wood stove flue, also known as a stove chimney, is a pipe that allows smoke and gases to escape your wood burning stove and vent outside of your home. In this article, we'll go over how to install a wood stove flue in a few simple steps.
Step 1: Measure and Plan
Before installing the wood stove flue, you'll need to measure the distance between the stove and the ceiling to determine the proper length of the flue pipe needed. Be sure to take into account any bends or elbows that may be necessary. You'll also need to determine the best route for the wood stove pipe through wall, to ensure that it's as short and straight as possible, which will help prevent dangerous creosote buildup.
Step 2: Choose the Right Materials
When it comes to wood stove flue materials, it's important to choose high-quality, safe and durable products. Our recommended option is 6 inch double wall stove pipe, which can provide adequate insulation and makes it easier to clean the flue. Double wall wood stove pipe is typically made from stainless steel and is insulated to prevent heat from escaping the pipe and causing a fire hazard.
Step 3: Installing the Stove Pipe
Once you've measured and gathered the necessary materials, it's time to start installing the stove pipe. Begin by attaching the stove pipe to the stove collar, making sure it fits securely. Then, connect each section of the 6 double wall stove pipe, using the manufacturer's instructions for the proper method of attaching the pipes. Make sure all connections are tight and secure, using screws or other connecting devices.
Step 4: Installing a Wood Stove Chimney
If you're installing a wood stove chimney, you'll need to attach the stove pipe to a vent cap or damper, which will then be attached to the chimney. Follow the manufacturer's instructions carefully for assembling the chimney and double-check that all connections are tight.
Step 5: Final Inspection
Once you've installed the wood stove flue, you should conduct a final inspection of the entire system, checking for any leaks, gaps or loose connections. Also, make sure that the wood stove pipe through wall and other components are securely attached and positioned at the proper angle.
By following the steps outlined above, you'll be able to safely and effectively install a wood stove flue in your home. Remember to use high-quality materials and follow all manufacturer's instructions for the best results. With proper installation and maintenance, your wood stove flue will provide reliable and efficient performance for years to come.
- Contact Us
-

About Pomoly
Pomoly is a leading camping brand specializing in hot tents and tent stoves. We are camping life explorer, Follow Page / Join Group, let's make camping enjoyful together!
Working Hours
Mon-Fri, 09:00 - 17:00

- Company Info
- NEWS
- About us
- Pomoly Name
- Leave-No-Trace
- Contact Now
- Facebook Group
- YouTube Learning
- Contact Us
- Topic Collections
- Policies & Terms
- Payment Policy
- Shipping Policy
- Return & Refund
- Privacy Policy
- Terms of Use
- Tax Policy
- Website Disclaimer
- Safety Disclaimer
- Warranty Policy
- Promotion Policy
- Pre-order Policy
- INTELLECTUAL PROPERTY RIGHTS
- Dealers Agreement And Terms
- Become Affiliate
- User Center
- Forget Password
- My Orders
- Tracking Order
- My Account
- Register
- Popular Searches
-
Tipi Tents Dome Tents Camping Tent Hammock Stove Camping Camping Pellet Stove Circle 6 Titanium Water TankDome X Locomotive 20 LEO 2 camping tent T-Brick 2.0 T1 2.0 tent stove Dweller wood stove Oroqen 2.0 Chimney Water Tank Lumberjack STOVEHUT Bromance 70 Tipi Pomoly Coupon Baker Oven Stove Titanium elbow Fire Pits Tent Stove titanium Stove Outdoor Pellet Stove
keebon pellet stove
Copyright © 2023 Pomoly All rights reserved. Sitemap
FREE SHIPPING | FULL REFUND | SAFE PAYMENT | EMAIL SUPPORT 粤ICP备2022065948号