


Cart
How to Repair Your Tent Instead

Your tent works hard to protect you—shielding you from harsh winds, heavy rain, and even the sun’s relentless UV rays. But over time, constant exposure to the elements, along with repeated setup and breakdown, takes its toll. Even the toughest tents aren’t immune to accidents.
By maintaining and repairing your tent, you’re not just extending its lifespan—you’re also honoring the protection it provides and getting the most value from your investment. Plus, keeping a repairable tent in use (and out of landfills) is a key step toward a more sustainable outdoor gear economy.
Luckily, many fixes are quick and doable, whether you’re in the field or at home. Here are the most common repairs you can tackle yourself:
-
Patch a tear in the tent fabric or mesh
-
Fix a stubborn zipper
-
Reseal leaking seams
-
Splint a bent or broken tent pole
And remember: Regular maintenance is just as important as repairs when it comes to keeping your tent in adventure-ready shape.
Essential Tent Repair Skills for Outdoor Enthusiasts
Your tent's fabric faces constant threats from nature - jagged branches, sharp rocks, and unexpected obstacles can easily compromise its integrity. Whether you're miles deep in the wilderness or back at your basecamp, having repair knowledge is crucial for maintaining your shelter's performance.
Two Practical Approaches to Tent Repair:
-
Immediate Field Solution: Keep a lightweight repair kit in your pack to address tears as they happen
-
Delayed Home Repair: Postpone the fix for when you have better tools and workspace
The key is addressing damage promptly, regardless of location, to prevent small issues from becoming major problems. Regular maintenance ensures your tent remains reliable trip after trip.
Patching Holes in Your Tent's Fabric Panels
To effectively patch your tent, you'll need just a few key items:
-
Rubbing alcohol (for cleaning the repair area)
-
A clean rag (to prep the surface)
-
Sharp scissors (for trimming tape or patches)
-
Durable repair tape (for quick, strong fixes)
-
Mesh patch (specifically for mesh doors or windows)
With these basic supplies, you’ll be ready to handle most tent fabric repairs—whether in the field or at home.
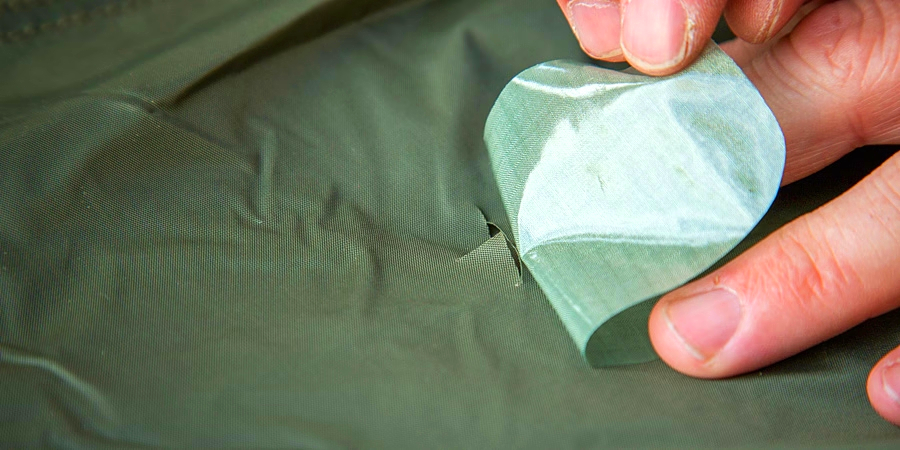
Follow these simple but crucial steps to ensure a durable, weatherproof repair:
- Work from the exterior side of the tent.
- Use a rag dampened with rubbing alcohol to thoroughly clean around the tear.
- Let the fabric dry completely (a few minutes should suffice).
- Measure and cut repair tape large enough to cover the hole with at least 1 inch of overlap on all sides.
- Round the corners (prevents peeling and improves adhesion).
- Lay the tent fabric on a flat, hard surface for best results.
- Peel off the backing and firmly press the patch over the tear, smoothing out any bubbles.
- For tears near poles or tension points, apply a second patch on the interior for extra strength.
- Allow the adhesive to set for 24 hours before folding or packing the tent.
Patching Holes in Your Tent's Mesh Panels
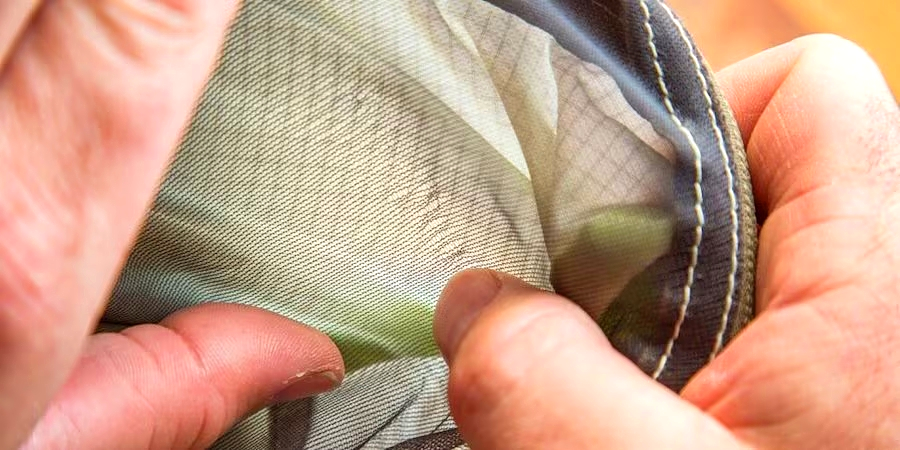
If your tent mesh gets snagged, try to push the strands back together. For bigger tears, use a mesh patch to fix it.
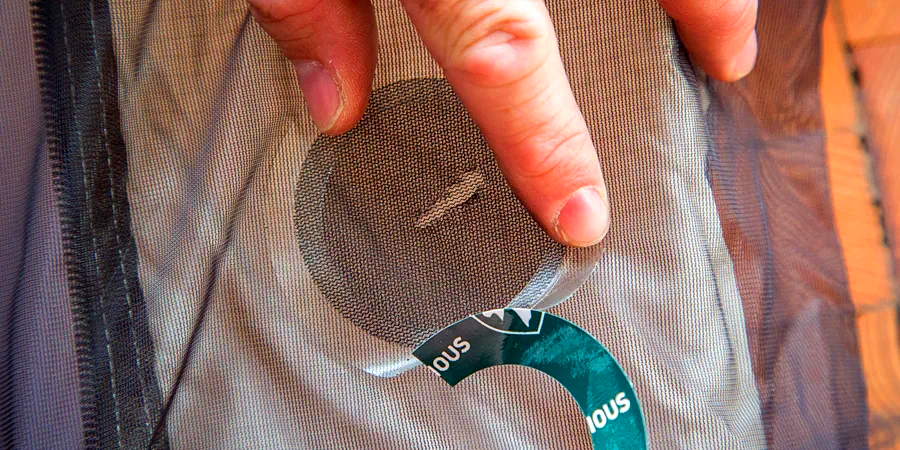
Got a hole in your tent's mesh? Follow these easy steps:
No mesh patch? A regular solid patch will work in a pinch - consider it a badge of honor from your outdoor adventures! (Though it won't be as invisible as a mesh repair.)
Lubricating a Sticky Tent Zipper
Trying to force a zipper that jams is a great way to cause more serious damage to the tent. Always check to be sure that the cause isn't simply fabric that got snagged.
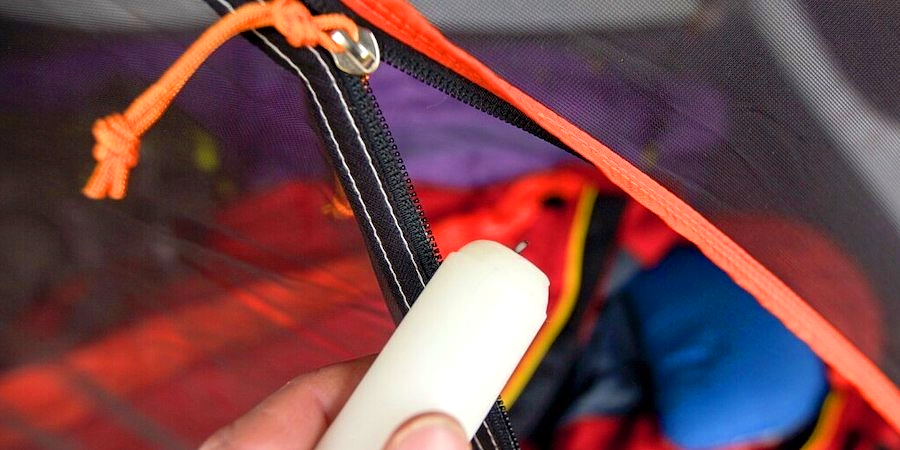
A sticky zipper doesn't have to ruin your trip. Here's how to get it sliding smoothly again:
Pro Tip: Always carry a small candle in your repair kit for emergency zipper fixes!
Sealing Leaks in Your Tent
Essential Tent Seam Repair Supplies:
- Clean rag - For prepping surfaces
- Rubbing alcohol - Cleans seams before sealing
- Seam sealer - Important: Silicone-treated fabric requires a different sealer than standard polyurethane-coated tents (most common). When in doubt, check with your tent's manufacturer.
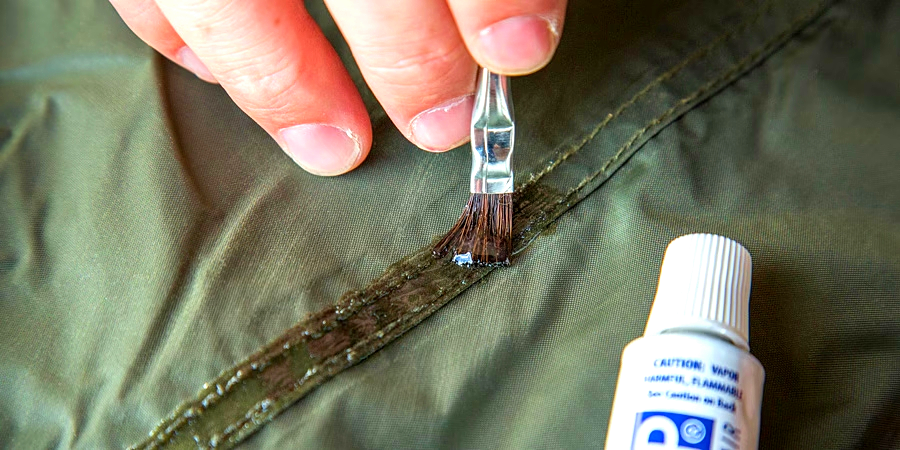
Follow these steps to properly reseal your tent seams and restore waterproof protection:
1.Prepare Your Workspace
- Set up your tent in a dry, well-lit area
- Flip your rainfly inside out (seam sealing is done on interior seams)
- Check all seams for worn or peeling sealant
- If multiple areas are failing, consider resealing all seams for complete protection
- Carefully peel away any loose seam tape
- Leave intact sections undisturbed
- Wipe seams with a rag and rubbing alcohol
- Let dry completely before proceeding
- Use the included brush to spread sealer evenly
- Create a smooth, uniform coating
- Allow sealer to dry fully before using tent
Even with perfectly sealed seams, condensation can still form and drip inside your tent. Proper pitching techniques help minimize this.
For older tents, leaks may occur as the waterproof coating (like on rainflies) wears down. In these cases, reapplying a waterproof coating restores protection.
Don't forget to refresh your tent's DWR (durable water repellent) coating too - just like you would on a rain jacket. This improves water beading and runoff. Bonus: Many DWR treatments also provide added UV protection. (Remember: Prolonged sun exposure breaks down tent fabrics, so avoid leaving your tent pitched in direct sunlight for extended periods.)
Splinting a Broken Tent Pole
Pole Repair Sleeve Instructions
The fastest solution for a broken tent pole is using a repair sleeve (also called a splint). These short tubes usually come with your tent, but you can purchase one separately if needed. Choose a sleeve that's slightly wider than your pole diameter for a snug fit. Here's how to use it:
- Prepare the pole: Align the broken sections. For bent poles, carefully straighten them first.
- Install the sleeve: Center it over the break. You may need pliers or a rock to reshape severely bent ends so the sleeve fits.
- Secure the repair: Wrap both ends of the sleeve with duct tape or other strong tape.
Note: For breaks at connection points, splinting will work but prevents proper folding when dismantling your tent.
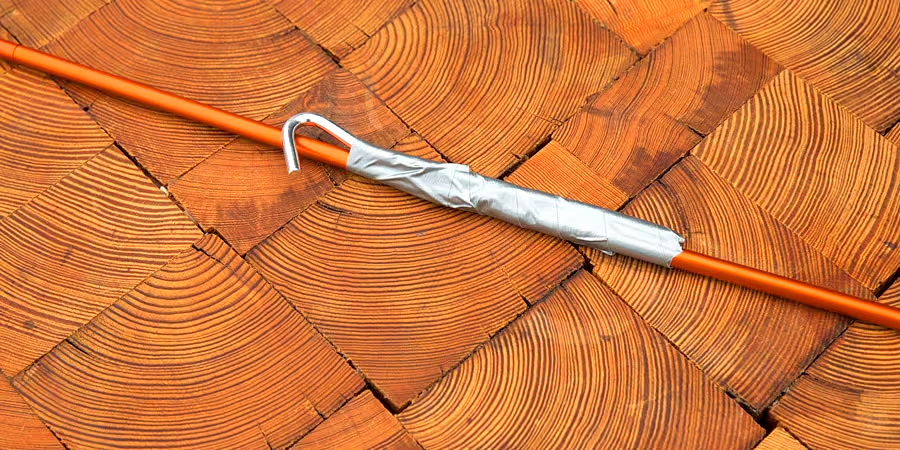
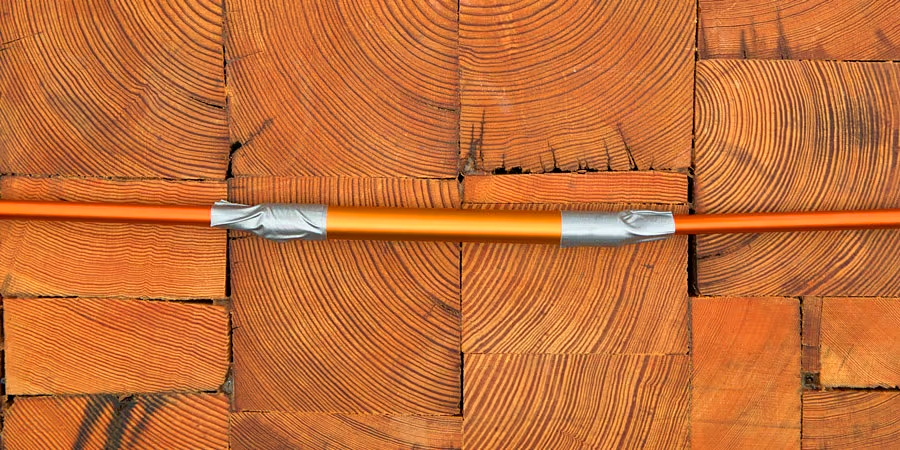
Improvised Pole Splint Using a Tent Stake
When you don't have a repair sleeve, a tent stake can serve as a makeshift splint:
- Prepare the pole: Align the broken sections. Straighten any bends if the pole isn't completely broken.
- Position the stake: Center the stake alongside the damaged area.
- Secure the splint: Wrap both ends of the stake-and-pole connection thoroughly with duct tape or other sturdy tape.
- Contact Us
-

Built for Outdoor Life!
At POMOLY, every product is designed with purpose and built for real outdoor use. From winter camping to remote backcountry adventures, our tents and stoves are made to perform in tough conditions.
Tested in the wild and trusted by hundreds of thousands of campers worldwide, POMOLY gear is built to keep you ready for every adventure.
Follow Page / Join GroupWorking Hours
Mon-Fri, 09:00 - 17:00

- Company Info
- About us
- Contact Form
- Pomoly Name
- Leave-No-Trace
- Facebook Group
- YouTube Videos
- Contact Info
- Topic Collections
- Policies & Terms
- Payment Policy
- Shipping Policy
- Return & Refund
- Privacy Policy
- Terms of Use
- Duty Policy
- Product Safety Notice
- Warranty Guidelines
- INTELLECTUAL PROPERTY RIGHTS
- User Center
- Forget Password
- My Orders
- Tracking Order
- My Account
- Register
- Popular Searches
-
Tipi Tents Dome Tents Camping Tent Hammock Stove Camping Camping Pellet Stove Circle 6 Titanium Water TankDome X Locomotive 20 LEO 2 camping tent T-Brick 2.0 T1 2.0 tent stove Dweller wood stove Oroqen 2.0 Chimney Water Tank Lumberjack STOVEHUT Bromance 70 Tipi Pomoly Coupon Baker Oven Stove Titanium elbow Fire Pits Tent Stove titanium Stove
Copyright © 2025 Pomoly All rights reserved. Sitemap
FREE SHIPPING | FULL REFUND | SAFE PAYMENT | EMAIL SUPPORT 粤ICP备2022065948号