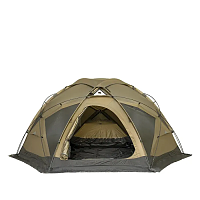
A tipi, also known as a teepee, is a traditional and versatile shelter that provides a unique camping experience. To ensure your tipi remains waterproof and withstands the elements, seam sealing is a crucial step. Seam sealing involves applying a waterproof sealant to the seams of the tipi fabric to prevent water from penetrating through. In this step-by-step guide, we will walk you through the process of seam sealing your tipi, ensuring a dry and comfortable camping experience.
Materials Needed:
1. Seam sealer (silicone-based or polyurethane-based)
2. Small brush or foam applicator
3. Clean cloth or sponge
4. Rubbing alcohol or mild detergent
5. Water source
6. Tent stakes (optional)
7. Protective gloves (optional)
Step 1: Preparing the Tipi:
1. Choose a well-ventilated and dry area to work on your tipi. It is recommended to perform seam sealing outdoors or in a well-ventilated garage.
2. Begin by thoroughly cleaning the tipi. Use a clean cloth or sponge dampened with rubbing alcohol or mild detergent to wipe away any dirt, dust, or debris from the seams. Allow the tipi to dry completely before proceeding.
At POMOLY Find the Best Camping Gear for You
Step 2: Applying Seam Sealer:
1. Before applying the seam sealer, read the manufacturer's instructions and ensure that it is compatible with your tipi fabric. Different types of fabrics may require specific sealants.
2. Start with the tipi's main seams, including the ridge seam and any other seams that are prone to water leakage. These are typically located along the top and sides of the tipi.
3. Apply a small amount of seam sealer to the brush or foam applicator. Begin by gently pressing the sealer into the seam, ensuring that it fills the stitching holes and covers the seam completely.
4. Use a smooth, even motion to spread the sealer along the seam. Apply enough pressure to force the sealer into the fabric, ensuring a secure seal. Be careful not to apply too much sealer, as it can create a thick and uneven coating.
5. Continue sealing all the main seams of the tipi, working your way around the fabric. Pay special attention to areas where two or more seams intersect, as these areas are more susceptible to leaks.
6. Once you have sealed all the main seams, inspect the tipi for any additional smaller seams, such as tie-out points or guyline attachments. Seal these seams as well, using the same technique.
Step 3: Drying and Testing:
1. After applying the seam sealer, allow the tipi to dry completely. Follow the manufacturer's instructions regarding drying time, as it may vary depending on the type of seam sealer used.
2. Once the tipi is dry, perform a water test to ensure the effectiveness of the seam sealing. Set up the tipi in an area where water can be sprayed or poured onto it.
3. Using a water source, gently spray or pour water over the seams of the tipi. Observe the interior of the tipi for any signs of water leakage. If you notice any leaks, mark the areas and reapply seam sealer as needed.
4. It is recommended to perform a water test before your camping trip to allow sufficient time for any necessary touch-ups or resealing.
Step 4: Additional Tips:
1. Some tipis come with factory-sealed seams. However, it is still advisable to inspect and touch up the seams before your camping trip to ensure maximum waterproofing.
2. Consider using tent stakes to secure and tension the tipi during the seam sealing process. This helps create a taut fabric surface, allowing the sealer to penetrate the seams effectively.
3. Wear protective gloves when working with seam sealer to protect your hands and facilitate easier cleanup.
Conclusion:
Seam sealing is a vital step in ensuring the waterproofing of your tipi. By following this step-by-step guide, you can effectively seal the seams of your tipi, providing a dry and comfortable shelter during your camping adventures. Remember to choose the appropriate seam sealer for your tipi fabric, clean the tipi thoroughly, and perform a water test to check for any leaks. With a properly seam-sealed tipi, you can enjoy the beauty of the outdoors while staying protected from the elements.


